The Order History page displays all of the individual (single orders) and bulk orders that you have placed in Betterview. To access this page, simply select Order History via the hamburger menu located in the top left corner.
Viewing your order history
Once on the Order History page, select the Order type to see single orders or a list of bulk orders that have been submitted in that workspace. A single order is a one-off order for any property that you have searched for and on which you have run a property profile. A bulk order allows you to upload a CSV file with the details of multiple properties and place an order in one go.
You can filter the orders further by:
- Order date
- Order stage
- Assigned To user

This page shows you the following details:
- Address
- Policy number
- External ID
- Assigned
- Order date
- Order stage - indicates whether an order was approved or became non-productive
Use the Order History page to:
- Look at the status of an order. Use the Order Stage column to see if the order has been completed (approved) or if it has become non-productive. This will help you understand if you are able to click on that address and be taken to an approved order or not.
- For non-productive orders, see the reason why an order became non-productive. For example, an order can become non-productive if imagery coverage is not available for that address at the time the order was placed.
- See the property profile for any address that is approved, just click on the address shown and you will be taken to the order.
Assigning orders
You can assign one or more orders to other Betterview users within your organization.
- Select the order(s) you wish to assign to one or more users by clicking the checkbox next to the address.
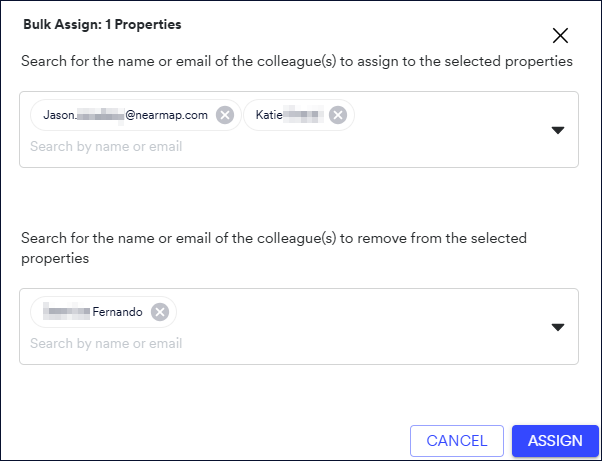
- Click the Bulk Add Assignments button above and to the right of the Order History table. The Bulk Assign : <number of> Properties dialog is displayed.
- Enter the email addresses of the users to whom you wish to assign the properties. If you wish to remove assignment of properties from users, specify the email addresses of those users as well.
- Click ASSIGN.