With the Bulk Upload feature, you can place an order for a large number of properties.
You can only perform a bulk-upload in the workspace you are in currently. If you need to upload addresses to multiple workspaces, you’ll need to create a separate upload file for each one, containing only the relevant records. Then, upload each file individually to its corresponding workspace.
Starting a bulk upload
- On the top left side of the Betterview Dashboard, click on the ellipsis to view the menu.
- Select the Bulk Upload menu item.
Uploading your CSV file
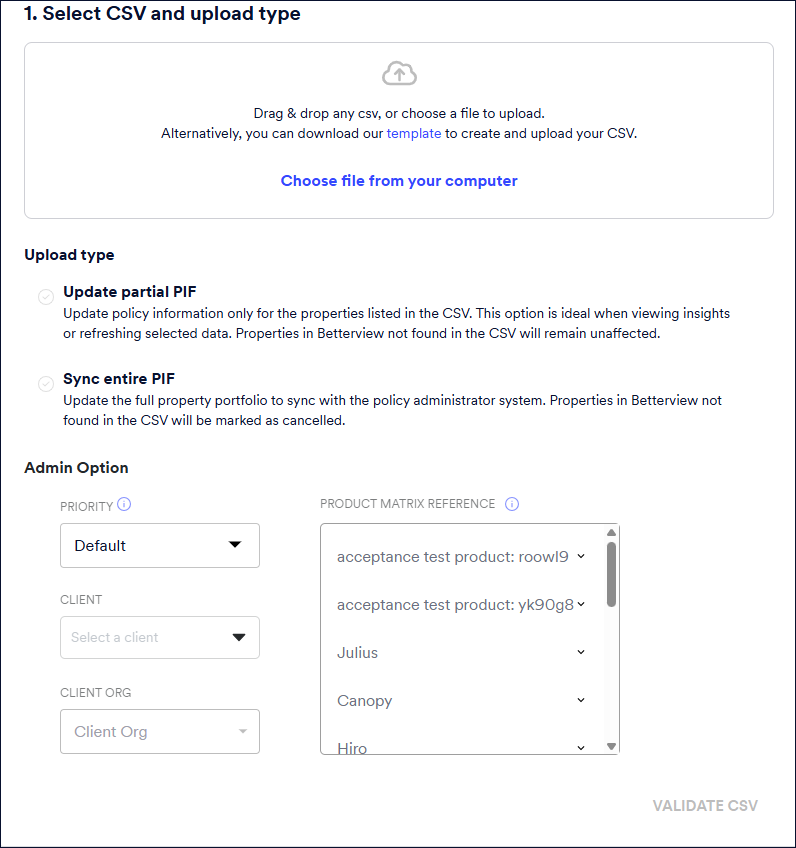
Upload your file
Upload or dragging and dropping a CSV into our bulk uploader.
If you don't have our Bulk-Order Template, download our template from that page by clicking the template link.
If you already have our template, you can either click Choose file from your computer to upload the file or drag and drop the file into this area.
You can continue to use the old bulk upload template, if it's required, but note that the new template has several additional fields related to policies and accounts as described here. You must switch to the new template if you want to use the Account and Policy feature.
Selecting Upload type
Select the Upload type from the following options.
- Update partial PIF - Select this option if you wish to add or update policy details only for the properties specified in the CSV file. Properties in Betterview that are not included in the CSV will remain unchanged. This option does not perform a full sync refresh in that it does not mark any records as inactive or cancelled.
- Sync entire PIF - Update the entire property portfolio to synchronize with the policies in force. Any properties in Betterview that are not included in the CSV file will be marked as cancelled.
Validating the uploaded file
Click VALIDATE CSV. The uploaded file is validated and any errors in the file, such as missing information in required fields or duplicates, are displayed.
The time it takes for validating the uploaded file when you select Sync entire PIF depends on the size of your upload and may take some time. You can submit your order only after the validation is complete.
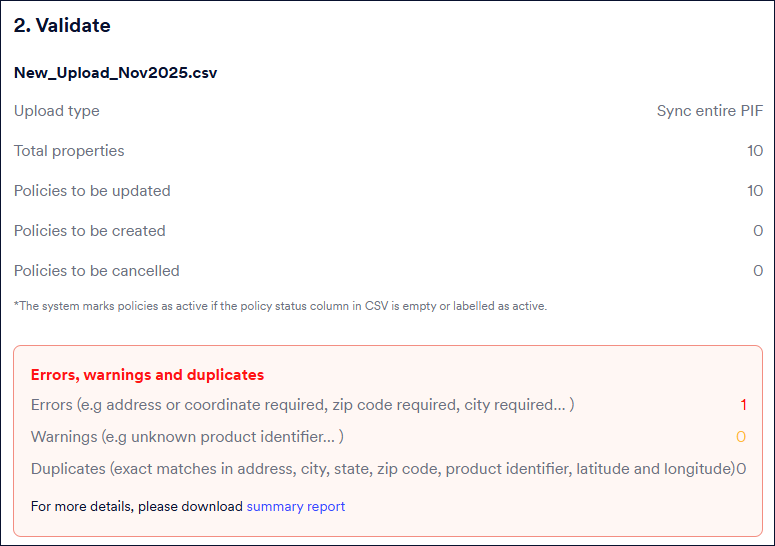
You can download the summary report to view the errors. The summary report contains the property records with the errors. Click CANCEL ORDER, correct the errors and upload the file again.
The template header needs to be all lower case, for example 'address' is accepted but 'Address' is not and it will give an error.
Submitting your order
Click SUBMIT ORDER. The system will start working on your order. The total processing time depends on the number of properties submitted as well as the size of those properties (larger properties = longer processing time).
The status of the bulk upload is displayed when you submit the order with details including Status, Order date, Upload type, Total properties (in this upload) and so on.
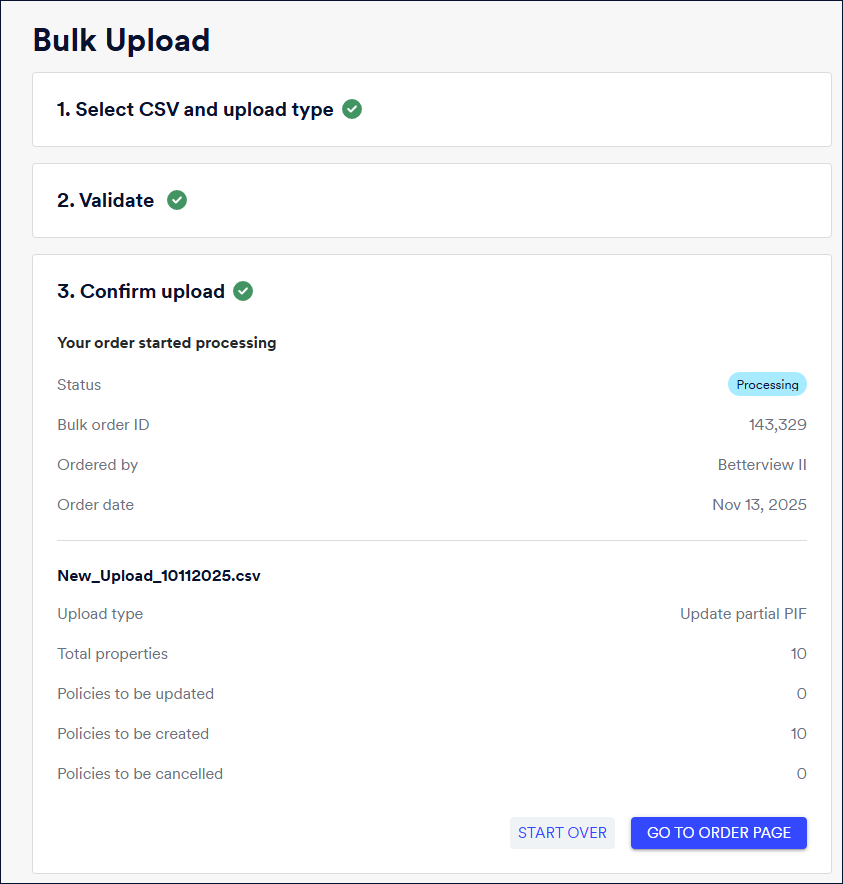
You can choose to start the upload again by clicking START OVER if you wish to add more properties to your CSV file. Otherwise, click GO TO ORDER PAGE to view your bulk upload order in the Order History page.