Nearmap’s 3D Export feature lets you download high‑resolution 3D data from MapBrowser for use in design, planning, and analysis workflows. This guide introduces the basics of 3D Export with links to more detailed Help Center articles.
What is 3D Export?
3D Export allows you to take Nearmap’s 3D data offline, making it easy to:
- Export textured mesh for visualizations and presentations
- Download point clouds for CAD, GIS, and engineering workflows
- Access DSM (Digital Surface Models) for terrain and surface analysis
Note: Exporting imagery uses area-based credits from your Nearmap subscription. If you cancel an export while it’s processing, the credits will still be deducted.
Before you export
Before you begin, make sure to:
- Check coverage – confirm 3D is available for your area
- Review data sizes – large exports may take longer to process
- Select the right format – based on your software and workflow needs
For more details, see Before You Export.
3D export formats
Nearmap offers multiple 3D formats to fit different workflows:
- Textured Mesh (3MX) – best for visualization and rendering
- Point Cloud (LAS/LAZ) – ideal for CAD and engineering work
- DSM (GeoTIFF) – great for surface analysis and terrain modeling
For an overview of the supported 3D formats, see 3D Export Formats.
How to export 3D
- Open MapBrowser and navigate to your area of interest.
- Select Export, 3D Export.
- Choose your export format (Mesh, Point Cloud, or DSM).
- Draw your export boundary (AOI) and set any parameters.
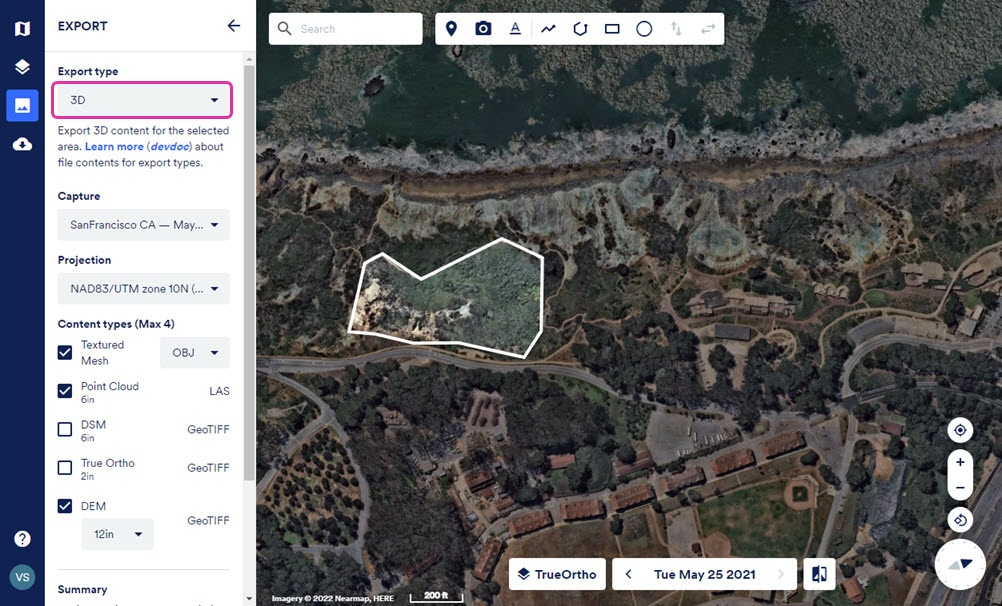
- Start the export and wait for processing to finish.
For step‑by‑step instructions, see Export 3D.
Downloading your export
When your export is ready, download it any number of times from MapBrowser within 60 days from the date of export. For detailed instructions, see Download Content.